New Year's ornaments - Stars of newspapers 1
Novogodisnji ukrasi - Zvezde od novina 1
You can make this interesting star of old
newspapers. Here are step by step how to make it.
Mozete
napraviti ovu interesantnu zvezdu od starihnovina. Evo korak po korak kako je
napraviti.
1. Use old newspapers,
old bags or any kind of papers you find. – Uzmite stare novine
ili papirne kese ili bilo koju vrstu papira koju nadjete.
2. If you are using thin paper, you will need to fold your
strips into several layers. – Ako
koristite tanji papir morate ga saviti u nekoliko slojeva.
3. Or
cut the newspapers into strips. – Ili isecite novine na
trake.
4. Each sheet fold in half, then fold in half again, to
create enough hard strips. – Svaku
traku presavijte na pola, pa opet na pola tako da dobijete dovoljno cvrste
trake.
5. Strips
must be enough hard that can support the weight of star. Cut the strips into
the equal length (length of your star). Prepare enough strips to as many stars as you want to make.
For each star you need 10 strips. – Trake moraju biti
dovoljno cvrste da mogu izdrzati tezinu zvezde. Isecite trake na istu duzinu
(duzina vase zvezde). Pripremite dovoljno traka za onoliko zvezda koliko zelite
da napravite. Za svaku zvezdu vam je potrebno 10 traka.
6. Find
the center on each of two strips, and glue them at right angles to each
other. If you are doing several stars,
just do that for the each star. – Odredite centar za svaku
traku i dve zalepite pod pravim uglom. Ako pravite vise zvezda uradite isto za
svaku.
7. Add
two more strips on the each side of central strip and on the other side (over
or under) of central strip. Glue in place and clip, using paper clips.– Dodajte
dve trake, po jednu sa svake strane centralne trake i sa suprotne strane (ispod
ili iznad) od centralne trake. Zalepite na mestu sastava traka i pricvrstite
spajalicama.
8. Now,
do the same thing in the other direction.
Try to be as precise as possible, to space between strips been evenly. –
Uradite isto i u drugom smeru trudeci se da budete sto precizniji tako
da rastojanje izmedju traka bude jednako.
9. The next step is probably the trickiest part of the
whole project. Take two corner pieces that are perpendicular to each
other and glue the tips together, overlapping one on top of the other.
This example shows this step implemented correctly. The strips have to be
twisted. – Sledeci korak je svakako najkomplikovaniji u celom
ovom projekyu. Uzmite dve ugaone trake koje su pod pravim uglom i zalepite ih
jednu za drugu tako sto ih uvrnete. Ovo je pravi nacin kako treba zalepiti.
10. In this picture the strips are glued together
incorrectly. – Na ovoj slici je pokazano kako ne treba lepiti
(nije ispravno).
11. Glue
all four sides in the same way. – Zalepite sve ugaone
trake na isti nacin.
12. Once you have the two same pieces glued, you can put
them together. Just turn one over on top
of the other, same sides facing, but with the top one rotated 45 degrees. – Kad ste napravili dva ista komada mozete staviti jedan
preko drugog s tim sto cete gornji okrenuti za 45 stepeni.
13. Begin
to insert free strips through hoops glued. It will seem to you that these tapes
longer than necessary, but they are not. – Pocnite da provlacite
slobodne trake kroz obruce zalepljenih. Izgledace vam da su ove trake duze nego
sto treba, ali nisu.
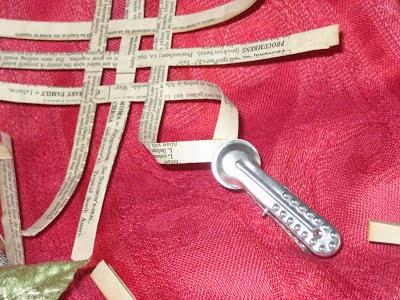
14. Take
the end of each remaining strip and add a drop of glue. Secure with a clip. – Na kraj
svake slobodne trake stavite kap lepka. Pricvrstite spajalicom.
15. First,
glue the top four points ... than the other four points. – Prvo
zalepite 4 slobodne trake gornjeg dela ... zatim i preostala 4 drugog dela
zvazde.
16. While the glue is setting on your star, you can create
a hanger. Take one of the extra strips and glue the ends together. – Dok se lepak na zvezdi susi mozete napraviti omcu za
zakacinjanje zvezde. Uzmite jednu traku i zalepite krajeve.
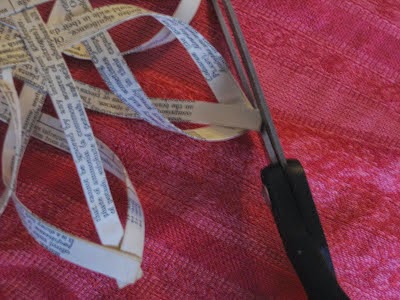
17. Points
where we glued one strip to another look a little sloppy. Trim those points up
with scissors. – Krajevi zalepljenih traka ne izgledaju bas najbolje. Isecite delove sto
strce makazama.
18. Now
you can glue the hanger to one of the points, and clip. –
Sada mozete zalepiti omcu za zakacinjanje na jedan od vrhova zvezde.
19. Your
star is finished. You can glitter or
embellish it any way you want. – Vasa zvezda je
zavrsena. Mozete je ukrasiti kako god zelite.
- You may want to glue dots on the tip of each point for
a nice finished look. – Mozete zalepiti kruzice na svakom kraku
zvezde
- ...
or add rosette on the place where we glued the hanger, or add some glitter on
the edge of star or something ... - ... ili dodajte
cvetic na spoju omce i zvezde, ili malo sjaja po ivicama krakova zvezde, ili
nesto ...
-
...
or you can make the star with more strips. - ... ili mozete napraviti zvezdu sa vise
traka.
I hope you like this star. See you tomorrow
with another star of old newspapers. – Nadam se da vam se svidela ova
zvezda. Vidimo se sutra uz drugu zvezdu od starih novina.


No comments:
Post a Comment